OFPI Payments Intents
With Belvo's Open Finance Payment Initiation (OFPI), you can collect payments from your customers and optimize their payment experience. In this guide, we’ll show you how to:
- collect payments from your customers
- track the status of your payment requests
OFPI Payment Intents flow
- Create a customer
A customer is a user (an individual or a business) that you request payments from. You will need to create a customer every time one of your users wants to pay for the first time. Once you create the customer, Belvo will assign a unique ID to that customer which you will need to use to collect all future payments from them.
Tip!
Whenever your user signs up for your application, you can already request the information required to create a customer. Once they complete your sign-up process, you can automatically create a customer in Belvo.
-
Create a payment intent
A payment intent captures all payment information (such as the amount to be charged, the description of the payment, and so on) and guides your customers through the payment flow. -
Receive a webhook confirming payment
You’ll get notified every time money is successfully transferred to your account. 😉
Create a customer
To create a customer, you need to make a POST Create a new customer call with the following core information:
{
  "identifier": "69700150844" // CPF or CNPJ
}
{
  "identifier": "12300399900",
  "name": "Music Production Brazil",
  "email": "[email protected]",
  "address": "postal address"
}
You’ll receive the following response from our API, confirming that the customer was created. Make sure to save the id you receive, as this ID is required when creating a payment link 🤓.
{
  "id": "49f244ef-06cd-49cf-ad0c-f43796e370ad",
  "created_at": "2020-04-23T21:30:20.336854+00:00",
  "created_by": "1c83ead8-6665-429c-a17a-ddc76cb3a95e",
  "customer_type": "INDIVIDUAL",
  "name": "Caetano Veloso",
  "country": "BRA",
  "email": "[email protected]",
  "identifier": "23******00",
  "identifier_type": "CPF",
}
{
  "id": "49f244ef-06cd-49cf-ad0c-f43796e370ad",
  "created_at": "2020-04-23T21:30:20.336854+00:00",
  "created_by": "1c83ead8-6665-429c-a17a-ddc76cb3a95e",
  "customer_type": "BUSINESS",
  "name": "Music Production Brazil",
  "country": "BRA",
  "email": "[email protected]",
  "identifier": "12300399900",
  "identifier_type": "CNPJ",
}
Now, with the customer.id you’ve just received, you can go ahead and create a payment link.
Need more info? Check out our API reference! 🤓
Create a payment intent
To minimize friction for your customer, we recommend creating your payment intent flow in such a way that you can send through all the information in just one POST call.
To do this, we recommend you:
- List all the possible institutions for the client to select from (using our institutions endpoint)
- Have a confirmation button once all the information is set.
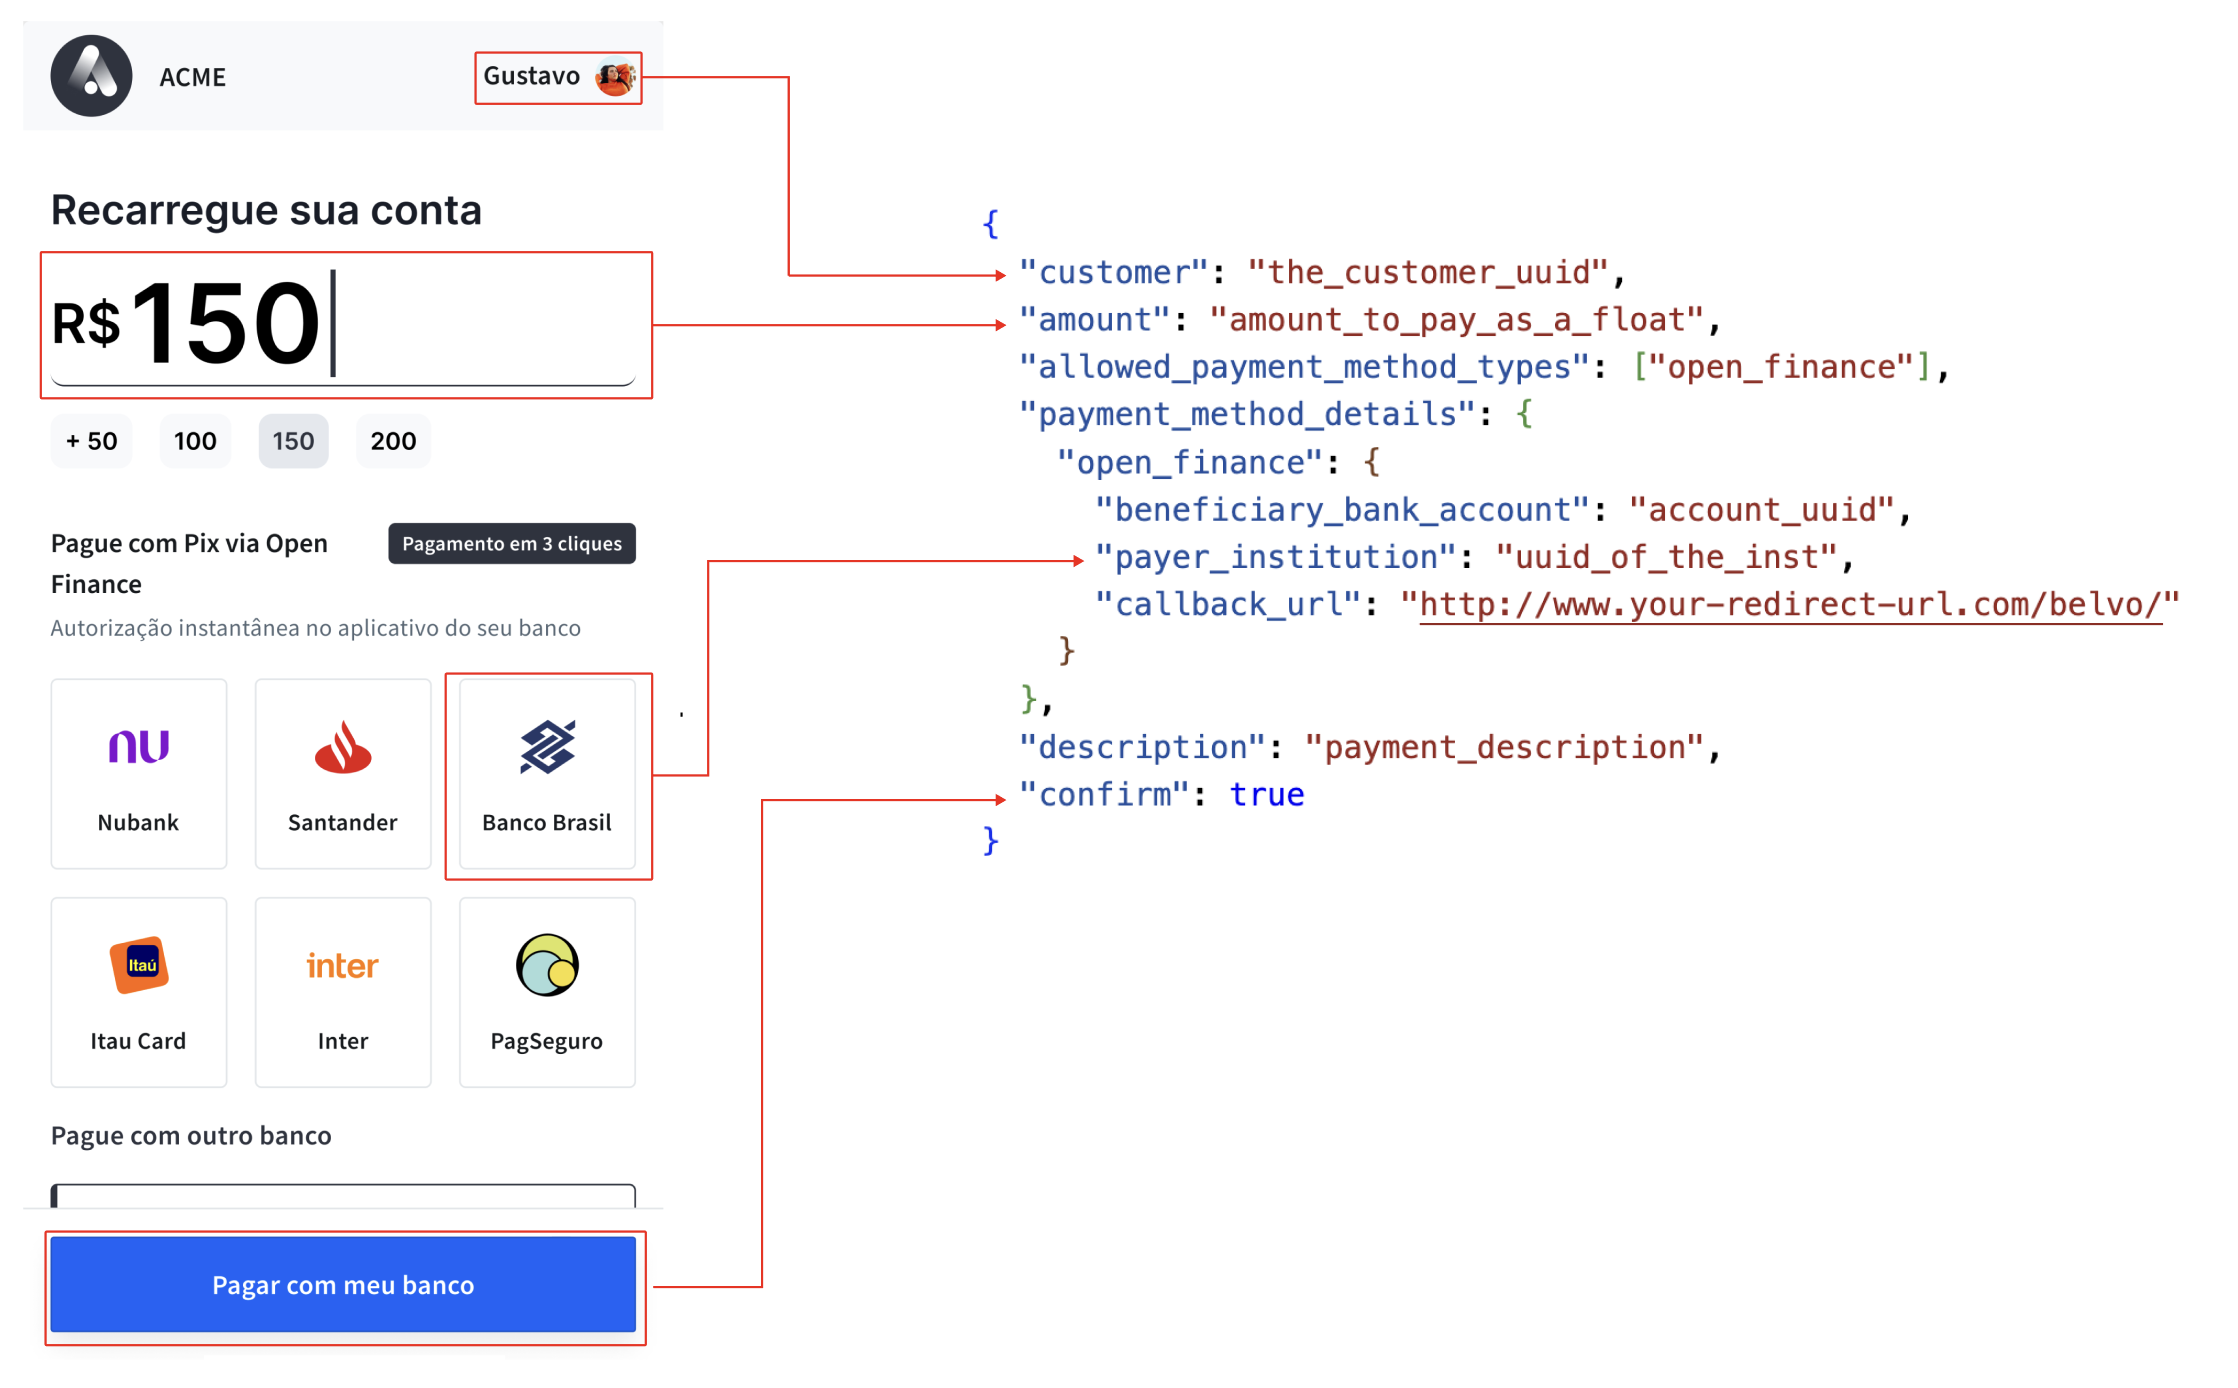
Recommended payment screen
Redirecting to your payment flow
Once your user completes the payment in their institution, the insitution will redirect them to a URL (provided by you). Make sure you have implemented the required redirect mechanism in order to receive the
payment-intent.idto complete the payment flow.
How do you know that your payment has been completed?
We’ll inform you of every successful payment by sending you a Transactions webhook - a payment transaction is an actual transfer of funds from one account to another 😉. This means that every time money has been successfully transferred to your account, you’ll receive the following notification:
{
  "webhook_id": "3b9a69f7-0f0a-455b-832d-49ad6fd4905c",
  "webhook_type": "TRANSACTIONS",
  "webhook_code": "OBJECT_CREATED",
  "object_id": "d2e40773-19f6-48d1-93c3-3590ec0c74df",
  "data": {}, //For OBJECT_CREATED webhooks, the data field returns an empty object.
}
You can also get details about a transaction by making a GET details call using the object_id of the transaction (which you receive in the webhook event).
{
  "id": "fd0f3303-cafb-47ea-9753-21155cb144ab",
  "created_at": "2020-04-23T21:30:20.336854+00:00",
  "created_by": "1c83ead8-6665-429c-a17a-ddc76cb3a95e",
  "amount": "500",
  "currency": "BRA",
  "description": "Awesome training Sneaker",
  "transaction_type": "INFLOW",
  "beneficiary": "a80d5a9d-20ae-479a-8dd7-ff3443bcbbfc",
  "payer": {},
  "payment_intent": "1c83ead8-6665-429c-a17a-ddc76cb3a95e",
  "customer": "3fa85f64-5717-4562-b3fc-2c963f66afa6"
}
Need more info? Check out our API reference! 🤓
Summary
In this guide you learned how to:
- register customers so you can start making payments
- create a payment intent
- confirm that a payment is successful
If you need any help, just reach out to our team at [email protected] and we’ll get right to it. 🙂
Updated about 1 month ago